Saturday, December 31, 2011

Year in Review

I haven’t been on the computer too much this last week.   First there was Christmas, then a niece’s wedding, then a Montana trip to visit my parents (and take down Mom’s Christmas decorations!)…anyway, not a lot of time for blogging!

But while the New Year’s Eve movie-of-choice is on (Unknown with Liam Neeson), I thought I’d follow a blogging tradition and pick a favorite project from each month to share

Hope you enjoy the journey!

January

The cabinet at the top of the stairs got a much-needed facelift!  (However, it got replaced in favor of something with a little more pizzazz in September, but I enjoyed the change until then!)

image


February

A friend and I threw a baby shower for a neighbor!  It was fun to decorate with ‘boy’ things.

image

March

My love of red came out in this cute numbered chest of drawers.

image


April

I shared how to replace a cane seat on a chair with kitchen utensils.

image

May

I knocked off an Anthropologie dresser, but in reverse!

image

June

Without a doubt, my most popular project EVER has been my French Chocolate table!  That’s OK, because it’s one of my favorites too!  It even inspired my to sell my sectional and buy a couch so I could keep it.

image

July

I was on a bit of a coffee table kick for a while!  This postcard table is another favorite; my little sister claimed this one!

image


August

I experimented with a little “Steampunk” in August.  I used old water valve handles as drawer knobs on this chest of drawers (it was claimed by another sister)!

image


September

I experimented with DIY chalk paint in September.

image


October

I dressed up the entrance to my home with vintage suitcase shelves.

image

And I’ll cheat a little in October, because there are two more projects that I just loved…

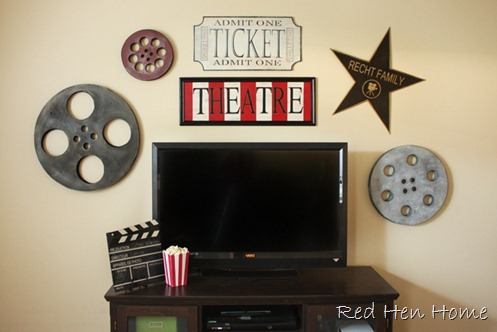
my Ballard Designs theater room knock-offs

image

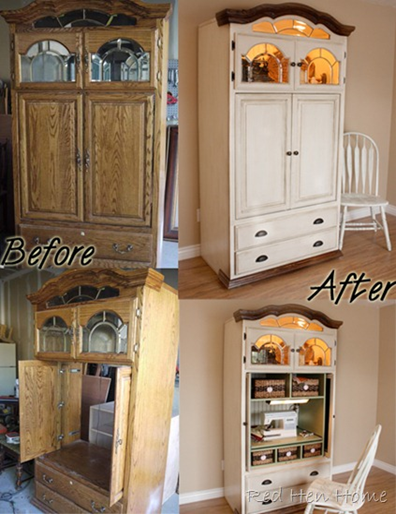
and the TV armoire I converted to a sewing armoire.

image

November

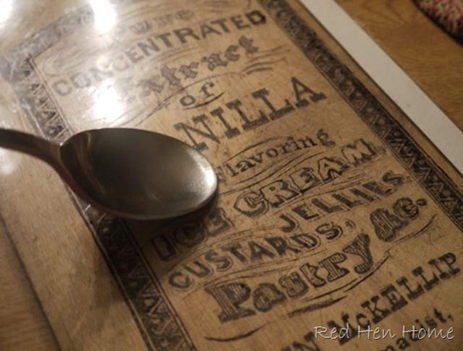
I “discovered” a simple way to do image transfers using a home printer and an overhead transparency sheet.

image

December

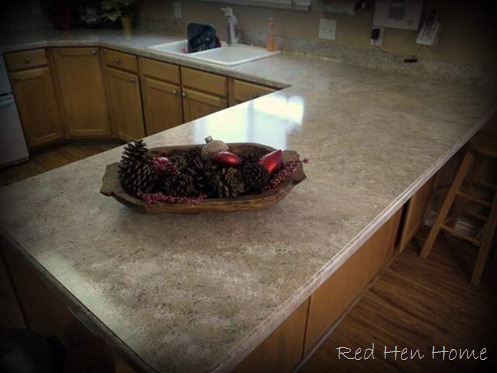
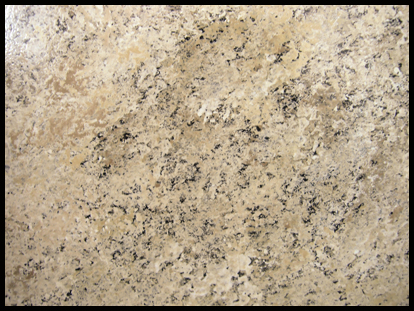
And just two weeks before Christmas, I refinished my kitchen counter tops using a Giani Granite painting kit!

image

***************************

Thank you for all the support, kind comments, and helpful suggestions you have offered over the past year!  I feel very lucky in my community of Internet friends.  You inspire me and motivate me.

I hope the New Year will be a fun and productive one for all of us!

***********************************

image

Monday, December 26, 2011

Giani Granite Review part 2 & Winner!

In case you  missed it…my review of the Giani Granite counter top refinishing kit is here

painting kitchen counter tops countertops

As I mentioned, I was NOT enjoying the whole wait-14-days-for-the-polyurethane-to-cure aspect! 

Well, guess what…

…I didn’t have to.

I e-mailed the link to my review to the Giani representative I had been working with, and she assured me that I really COULD start using my counter tops!  Sure, it takes 14 days to fully cure, but I could start putting my small items back on.

I was so delighted…and relieved!

So although I ended up waiting about a week before I used  my counters, by last Wednesday night we were pretty much back in business, as follows:

  • Wednesday I spread a tablecloth on the peninsula, but then we used it for a pot-luck dinner for eleven friends. 
  • Thursday I baked 25 loaves of bread for neighbor gifts, and assembled about 15 bags of almond roca, pecan crunch, and white chocolate macadamia popcorn.
  • Saturday I made two pans of Potatoes Benson, Christmas Jell-o (my kids love it), Hawaiian haystacks, two pumpkin pies, one cherry pie, and one raspberry brownie torte.
  • Sunday I made bacon, eggs, Bubble bread, hot spinach-artichoke dip, ham, rolls, and spinach salad.

So I would say the counters have gotten quite the work-out in the past week!  And guess what?  No chips, no scratches! 

I’m hoping they will continue to hold up as well after they are fully cured!

So without further ado, the winner of the Giani Granite giveaway is:

image

Anne from Creative Southern Home, who said:

image

Congratulations, Anne!  I will be e-mailing you.

Saturday, December 24, 2011

This Christmas…

This Christmas:
Mend a quarrel.
Seek out a forgotten friend.
Dismiss suspicion and replace it with trust.
Write a letter.

image

Give a soft answer.
Encourage youth.
Manifest your loyalty in word and deed.
Keep a promise.

image

Forgo a grudge.
Forgive an enemy.
Apologize.
Try to understand.

image

Examine your demands on others.
Think first of someone else.
Be kind.

Be gentle.

image

Laugh a little more.
Express your gratitude.
Welcome a stranger.
Gladden the heart of a child.

image

Take pleasure in the beauty and wonder of the earth.
Speak your love and then speak it again.

image

 Howard W. Hunter

******************************************

May you keep the Spirit of Christmas in your heart all the year!

Love,

Korrie

Friday, December 23, 2011

The Day Before the Night Before Christmas

We used to listen to this song over and over each December 23…

….now I torture my children with it!

Just remember:  It’s no good being good for a day!

Thursday, December 22, 2011

Christmas Table

For the past three years, I have been part of a “Dinner Group.”  Twelve women get together for a pot-luck supper on the 3rd Wednesday of each month, rotating so each gets the chance to play hostess.

Last night, it was my turn!

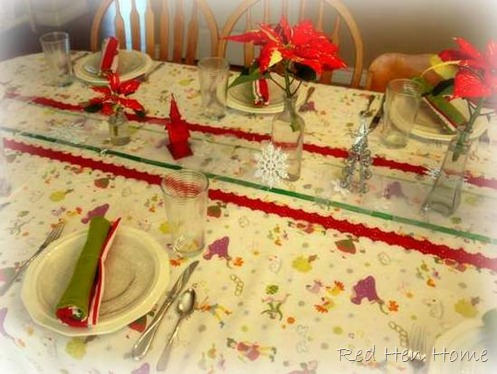
It’s not too fancy, but I thought I’d show you my holiday table.

Someday I hope to have a beautiful farmhouse table and lots of pretty dishes…(or maybe not…I don’t look forward to figuring out how to store them)…

Table 001-1

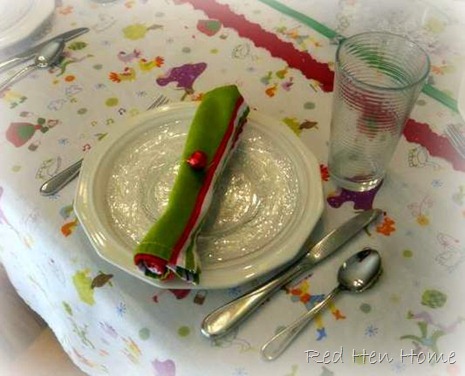
…but for now my every day dishes, cups, and silverware work just fine. They just get dressed up a little for Christmas!  I used miniature glittery Christmas balls for napkin rings.  I have NEVER used napkin rings before!  This is super fancy for me!

Table 003

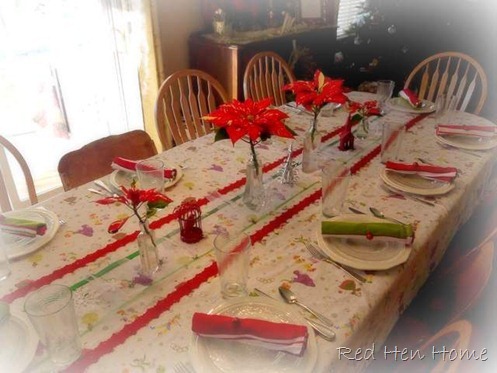
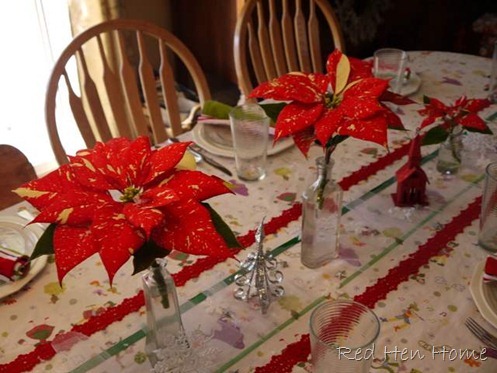
My “12 Days of Christmas” tablecloth and napkins (purchased after Christmas several years ago) get pressed into service often during the holidays because I love them so much(mostly I ignore niceties like tablecloths).  I dressed up the center of the table with ribbons running the length of the table, and a gathered strip of tulle in the middle.

Table 005

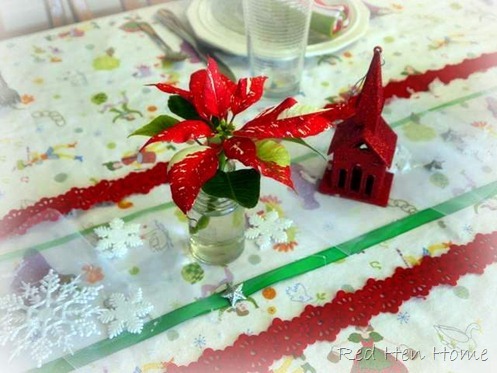
One of my lovely poinsettias that I showed here was dying (no, I don’t know what I did to it), so I clipped off the good blooms and placed them in a few old bottles.  If you don’t know the trick to preserving poinsettia blooms, here it is:  you have to burn the ends of the stems right after cutting.  Who knew? 

Table 002

Then I added a few glittery Christmas ornaments and lots of snowflakes and stars around everything.

Table 004

It was strangely satisfying to set a pretty table!  Maybe I’ll be hooked now!

Don’t count on it.

*******************************************

Don’t forget to enter the Giani Granite Giveaway!  Ends 12/26.

Wednesday, December 21, 2011

Giani Granite Giveaway!

Yesterday I showed off my “new” kitchen counter tops, courtesy of Giani Granite

kitchen 034

Giani Granite has generously offered to provide one of my readers with a kit of their own!  They have six different color options to choose from, and each can have multiple different looks (click on the links to see some of the other shades).

There’s Sicilian Sand (my choice):

image

Bombay Black (Gail @ My Repurposed Life reviewed this one):

image

Chocolate Brown (I almost picked this one):

image

Plus there’s Roma Red, Emerald Green, and Sapphire Blue!

Each kit comes with a primer/base coat and three mineral accent colors, plus the polyurethane top coat and the rollers and sponges necessary for application.  An instructional DVD is also included, BUT there are more helpful videos available on-line.  Don’t miss them like I did!!

Note:  Each kit is supposed to cover 35 sq. ft.  However, one kit covered my 45 sq. ft. kitchen, if you don’t count the extra polyurethane I used trying to get the “perfect” finish.

*******************************

There are 4 ways to enter the giveaway!  Leave a separate comment for each one.

  1. Leave a comment telling me which color you would choose!  Please leave your e-mail address if it isn’t linked up to your account!
  2. “Like” Giani Granite on Facebook and tell them Red Hen Home sent you!  Come back here and leave me a comment telling me you did.
  3. Facebook, blog, or tweet about the giveaway, and leave me a comment telling me you did.
  4. If you follow Red Hen Home, leave a comment telling me you do for an extra entry!

Good luck!  Giveaway will close Monday, December 26, 2011, at 9 p.m. MST.  Winner will be chosen via random number generator.

Tuesday, December 20, 2011

Review: Giani Granite–Countertop Makeover

I have issues with my kitchen.

The problem is…there’s nothing really wrong with it….

it’s just not me.

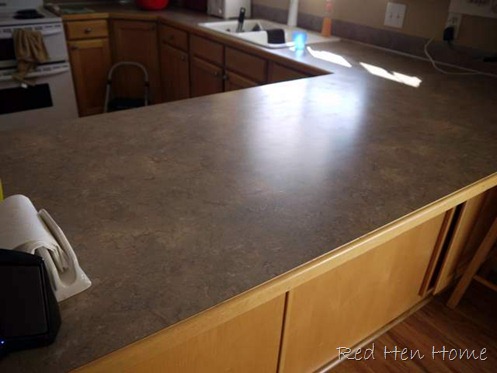
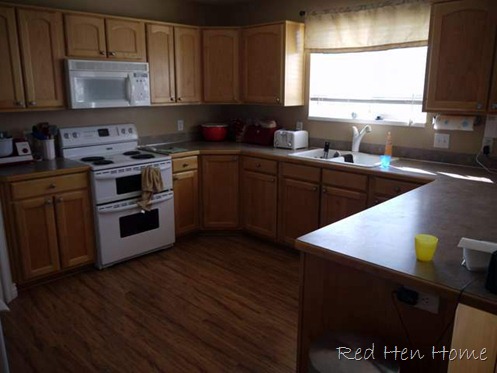
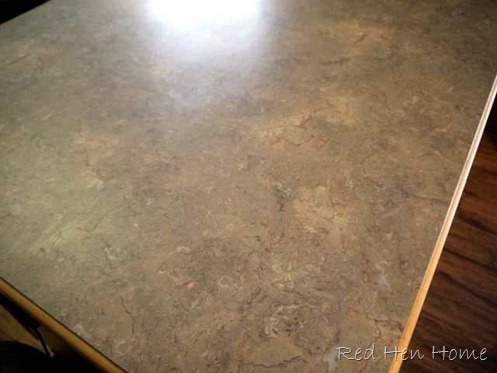
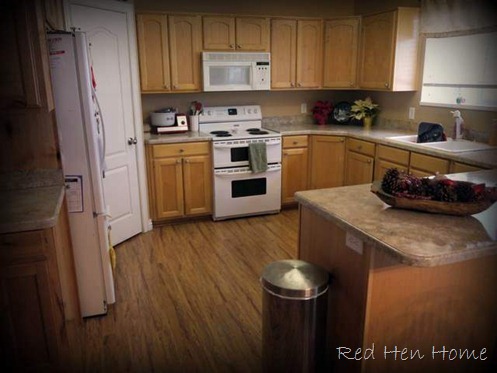
The alder cabinets have weathered to an unbecoming yellow.  The counter tops are in perfectly fine shape, except they’re gray….and I am neither a yellow NOR a gray person!
Christmas2011 019

Christmas2011 020

This is what my kitchen really looks like.  No…actually, it’s cleaner than usual.

So I’ve been dreaming of replacing my counter tops and painting the cabinets, and I thought maybe 2012 might be the year. (If we didn’t have to spend our tax return on things like hot water heaters and water softeners, that is—that’s what happened in 2011!)

But Christmas came a little early this year!

Giani Granite offered me the chance to review one of their counter top refinishing kits, and I jumped at the chance!  I figured, if I loved it—I wouldn’t have to shell out the money for new.  If I hated it…I wouldn’t really be any further behind!

Decisions, decisions…Giani Granite offers SIX different color choices, but depending on how you apply the paint, you can get many different looks.  I chose Sicilian Sand, to go along with my dream of a lighter, brighter kitchen (and yes, now that I’ve painted the counter tops I REALLY want to tackle the cabinets).

The process is not particularly difficult, although there IS a difficult step (I’ll get to that later)..actually two.

First, clean your counter tops very well.  I used an SOS pad and rinsed twice.  And yes, I used the SOS pad even on the wood edges of my counters, since I was planning to paint them too.
kitchen 008

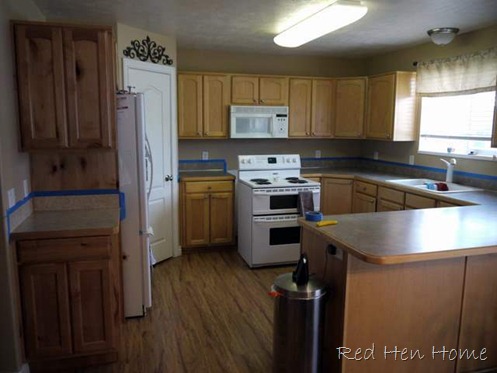
Next, I taped above the backsplash and on top of my dishwasher.   I also taped around my sink.
kitchen 011

You have to remove all silicone caulk, as paint will not stick to it.  Lucky for me, I only had caulk on this little section (it covered the seam between the countertop and backsplash), because it’s a bugger to remove!  This little cabinet was an “after-thought” added to my kitchen, and the color on the top never did match the rest—another good reason to paint!

kitchen 009

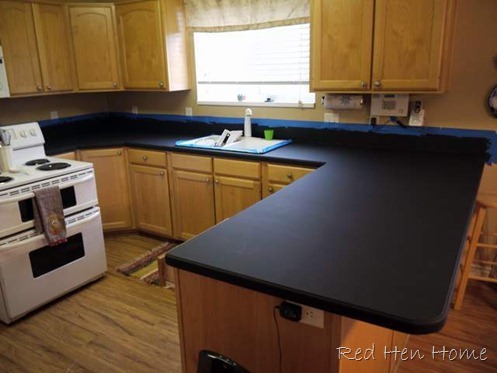
Next, you roll on a primer/base coat of black.  As far as I can tell, ALL the color choices use this same black primer.  It’s water based, but not latex.  It sticks really well, especially where you drip it on the floor—but then you have another use for those SOS pads you just bought…

Anyway, the base coat has to dry for 8 hours at 70 degrees.  I did this after I got my little kids to bed, and just left the heat turned up for the night.
kitchen 012

See?  I covered up the ugly wood edges!  That made me so happy.
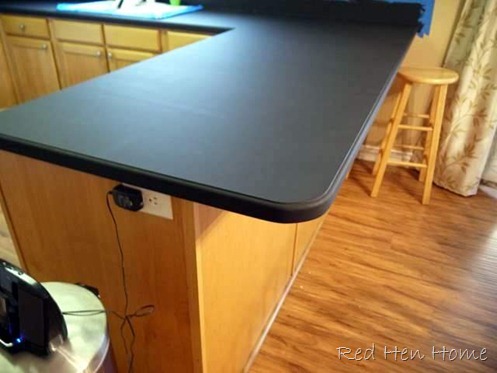
kitchen 013

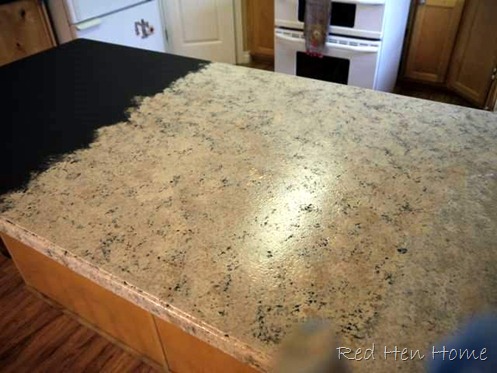
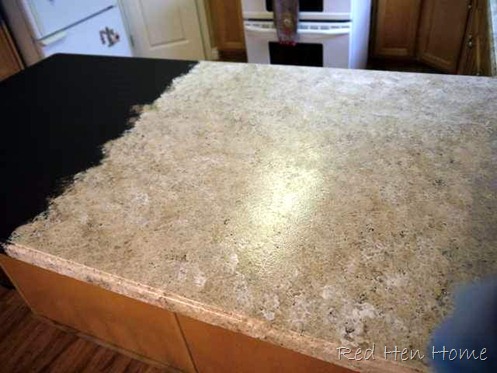
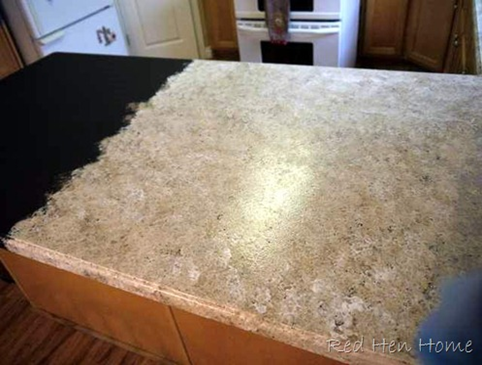
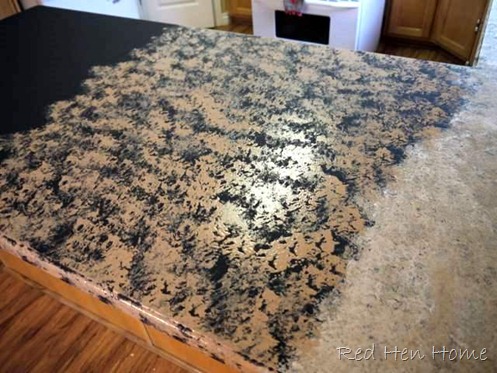
The fun part came the next morning!  Using an included sea-sponge, I applied the three accent colors over the base coat.  You do this in sections, using all three colors at once.  This gives the layered, blended look I wanted.

Here’s what it looked like after one color (middle section):
kitchen 016

Now two:

paint kitchen countertops counter tops

And finally three:

painting kitchen counter tops countertops

I didn’t stop there.  I went back over the sections with more dark or more light color, working in “flows” of color to get a more natural look.  In addition, I also did a little color mixing so I actually had five shades to work with and not just three!  I really liked the extra depth of color this gave me.

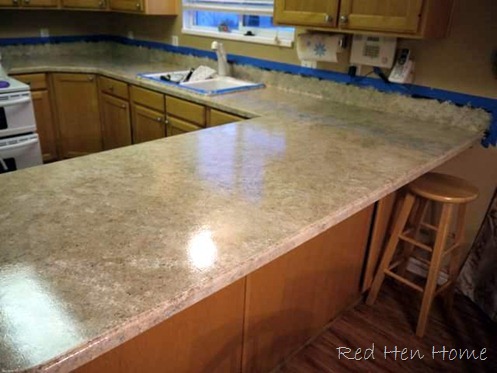
You can kinda-sorta see a lighter “flow” in the bottom left corner.  I think that’s my favorite part of the whole counter!
Giani Granite countertops counter tops

After the color-work has dried for four hours, then you apply an automotive polyurethane.  That’s the tricky part!  This stuff is very thin, and it dries really fast.  It has a great shine, but if you accidentally roll over a spot that has started to dry, or if you miss a spot---you’re going to know it, because it will leave a dull spot, or you may see a roller line.

Although I watched the DVD that came with the kit and read the instructions carefully, I had a very difficult time getting a smooth finish on my large peninsula.  Too late I found that there were  more helpful videos available on-line.  By that point, I literally had 7 coats of poly on the peninsula!  It’s still not perfect—

but I. am. done.

It’s good enough!  I don’t think anyone but me will notice the imperfections.

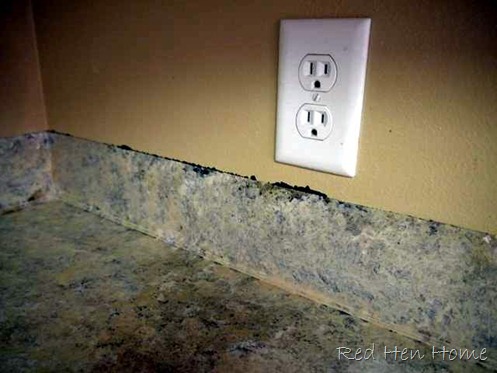
You can see that I didn’t do a great job of pressing down my tape.  Learn from my mistakes!
Giani Granite

I had to go back with a small brush and touch up where the paint bled.

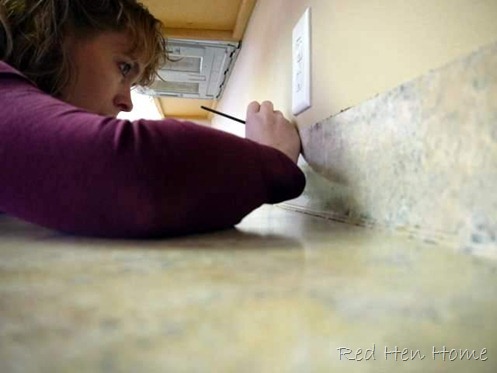
On the main sections of my counters, there is a metal strip the hides the seam with the backsplash.  I don’t know if it’s “recommended” or not…but I just painted right over it!
kitchen 027

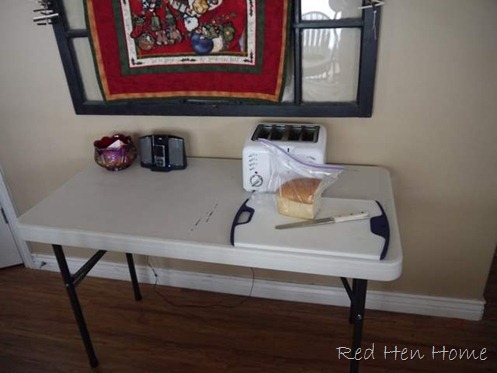
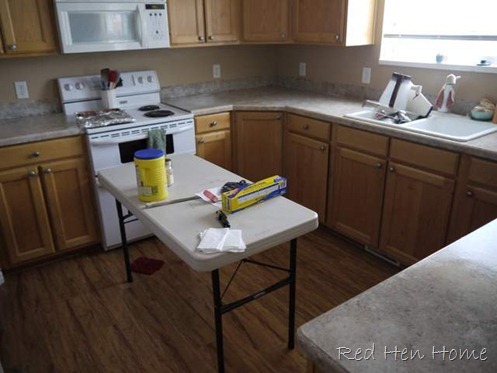
The second hard part of the process is that it takes 14 days for the polyurethane to fully cure.  That’s a long, long time for a family of eight to go without their counter tops!

We “make do” with folding tables here…
kitchen 028

…and here…

kitchen 029

…and yes, it’s putting a crimp in my holiday baking and candy-making!  However, we are still trying to sell our house, and I figured the ONLY time I could take two weeks “off” from having it ready for a showing was in the two weeks before Christmas!  NO ONE is going to be house hunting right now…right??  (So far, it’s working!)

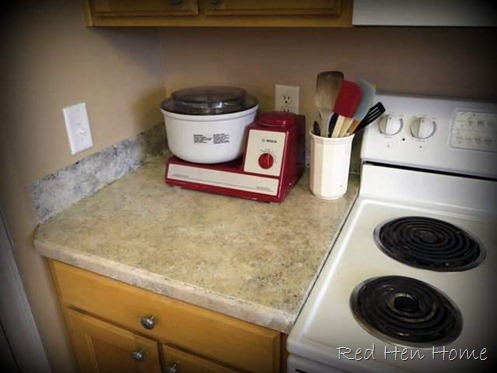
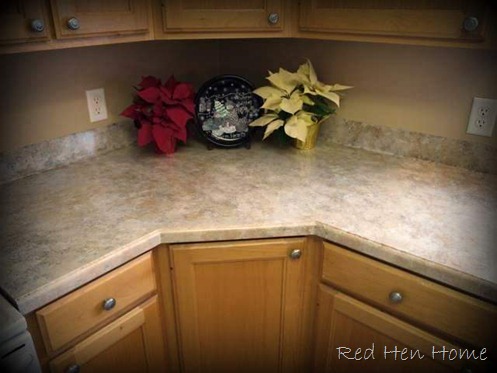
Now, I fully recognize that it’s difficult to see the difference in the “look” from photographs…but trust me, it’s there.  Instead of grays I have warm shades of brown, and I *don’t* have that wood trim anymore! 

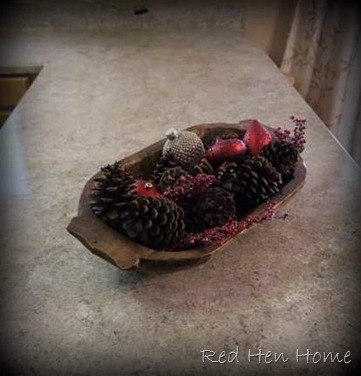
So while I still can’t fully use them, I briefly added a few accessories so you can see what they look like…
paint kitchen countertops counter topsPainting kitchen countertops countertopsGiani Granite counter tops countertopsPainting kitchen counter tops countertops

And now I want to paint my cupboards more than ever!  I’m thinking a light almond color would be really nice in here.

Giani Granite

So what do you think?  Is this something you would ever consider trying?  A Giani Granite refinishing kit costs around $80.  Compared to $3500+ for real granite, I think I made out pretty well!

You can also visit My Repurposed Life for a review of the Bombay Black Giani Granite kit.

If you would be interested in trying Giani Granite in your home, be sure to visit HERE for a GIVEAWAY!  Giani has generously agreed to provide one of their kits to a Red Hen Home reader—your choice of their 6 colors!

Disclosure: Giani Granite supplied me with a kit to review free of charge, but all opinions are mine.  I received no compensation to write this review.

*******************************************

Linking up here:

Domestically Speaking’s Power of Paint Someday Crafts’ Whatever Goes Wednesday
Hookin’ Up with House of Hepworths No Minimalist Here’s Open House Thursday
Friday Remodelaholic 2805
My Simple Home Life’s Simple Creations Friday Miss Mustard Seed’s Furniture Feature Friday
Funky Junk’s Saturday Night Special The DIY Show Off
Beyond the Picket Fence I Heart Naptime
Shabby Nest’s Frugal Friday {Primp}
  My Repurposed Life